One of my favorite ways to rewind is high crafting. My go-to crafting sesh starts with a couple bowls of sativa to get the creativity flowing, then I dig into my stash of art supplies. Zines are a great high-crafting activity; a simple and fun craft with lots of possibilities and a cool history.
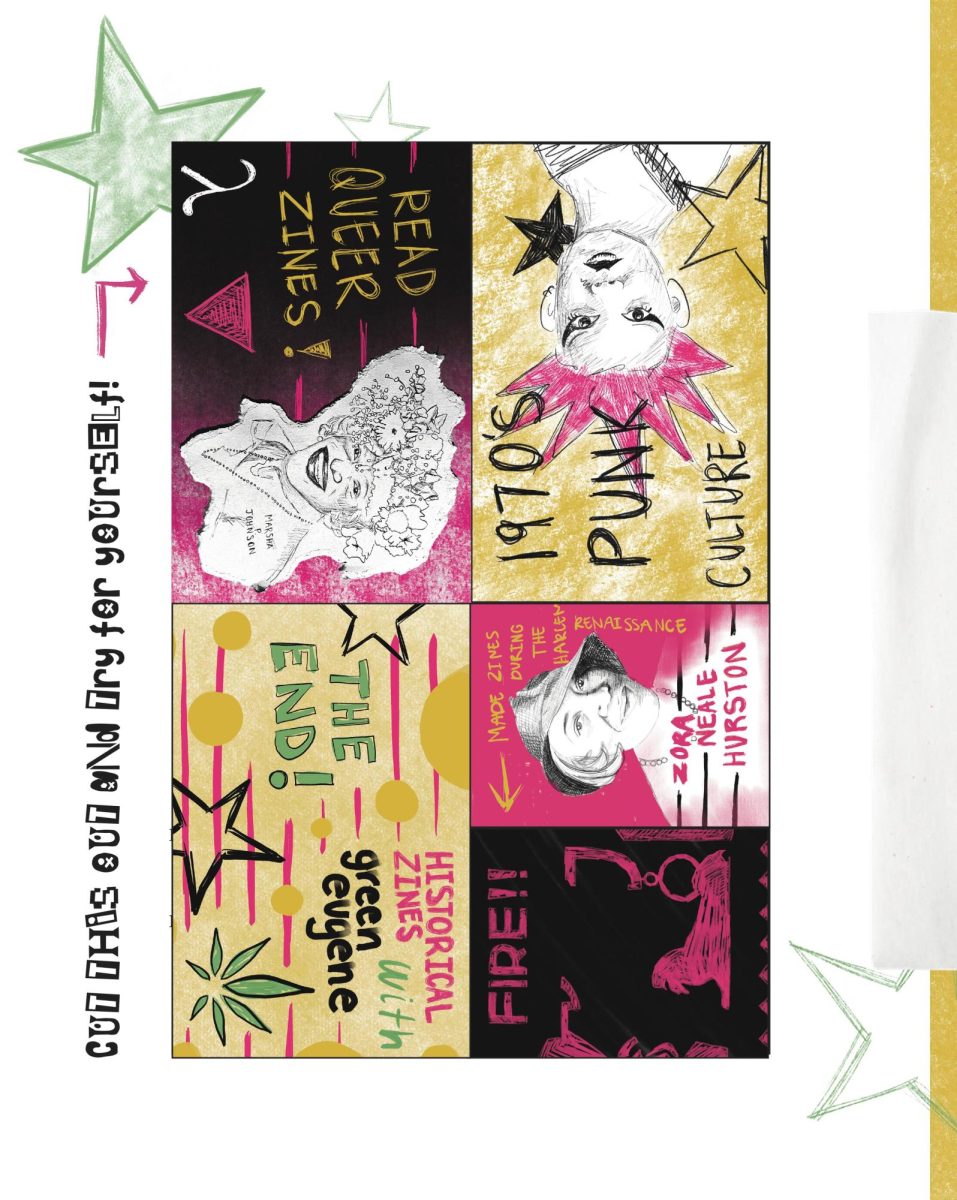
Okay, but what is a zine? They’re typically small-batch, handmade magazines or booklets (can be digital too) with a focus on topics that are historically unconventional or taboo. However, there’s no strict rule for zines; they can be about anything or used to showcase works of art, poetry, stories, comics, photography, etc.
Zines have an interesting history, with some crediting them as the start of the “fandom,” being used for niche shared interests like sci-fi pulp fiction, comics, music genres, shows, movies, etc. They were also used by various movements throughout history to spread their messages within the community. Zines were used during the Harlem Renaissance, the 1970s punk culture, the “Riot Grrl” scene, and within queer communities. The Knight Library even has zines as part of their rare book collection, with some available online. Check out their website to learn more about them!
Now that I’ve covered what a zine is, let’s talk about how to make a zine. There are lots of great resources and templates online, especially on Pinterest. Thankfully, though, it’s a relatively simple process. My freshman year, I learned a super easy way during a UO LGBTQA3 Alliance event in the EMU.
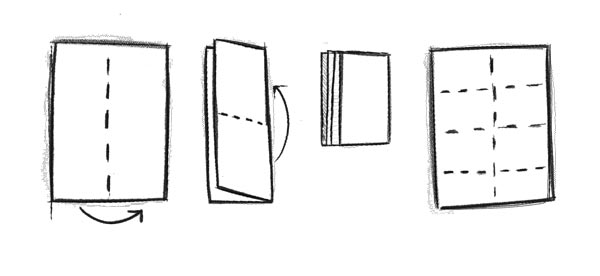 Step One: Grab a rectangular piece of paper; think printer or construction paper, but anything will work. Turn it horizontally and fold it in half, then fold it in half both ways, creasing the edges as you go to create four panels. The goal is to fold the paper so that when unfolded, there are eight panels in total.
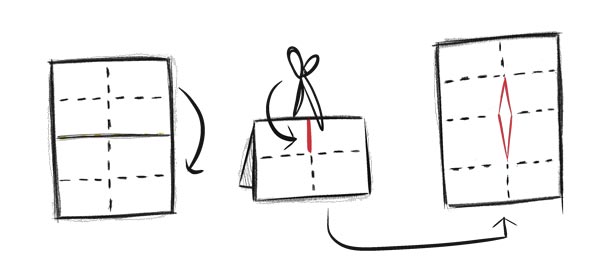 Step Two: If you unfolded the paper, refold it in half, then in half again, so you see four panels. Then cut through only halfway from the folded edge – so when the paper unfolds, there’s a cut in the exact middle of the page, right between the middle four panels.
 Step Three: Unfold the paper and fold it the long way so the cut portion is on the edge, then push the sides of the paper in so the cut closes to create an “X” shape. Fold the pieces together to form a small booklet. Now you’re ready to make your zine, pick a topic, or just make some fun art.
Pro Tip: Make multiple little booklets, nestle them inside each other, and staple them together to create more pages!
And that is all you need to know about zines to make your own and distribute them, or get your friends together to have a zine-making party and exchange them; the possibilities are endless.